What Is A Homebrew Kegerator Setup
Table of Contents
What is a Homebrew Kegerator Setup?
Introduction
Imagine coming home after a long day at work to a perfectly chilled, frothy schooner of your very own beer to enjoy in the comfort of your own home. Well you can do just that with a homebrew kegerator setup.
A kegerator is essentially a refrigerator that is modified or designed to store and dispense kegs of beer. A homebrew kegerator setup offers you a blank canvas to experiment different brewing methods, ingredients, and styles. From adjusting fermentation temperatures to experimenting with different carbonation levels, the customisation possibilities are endless.
What is in a Homebrew Kegerator Setup?
Building your own homebrew kegerator can be as simple or as complex as you like, depending on your budget, space, and thirst for beer. Here’s what you will need to get started.
1. The Kegerator Unit
This is the heart of your setup. You can go out and purchase a pre-built kegerator with everything you need as a package or convert an old refrigerator using a conversion kit. When first choosing a unit, think about the size and number of kegs you plan on using. Most homebrewers starting out go with the single tap system, but we highly recommend going for at least a double tap giving you the option of brewing multiple flavours or types of beer.

2. Kegs
The most popular type of keg for homebrewers is the Cornelius or (corny) keg. This 19 Litre keg is tall and slim which allows you to fit up to four kegs in most kegerators on the market today. Homebrewers favour these kegs for a few different reasons. They are made from stainless steel making them resistant to corrosion. They are reusable, making them environmentally friendly compared to plastic and disposable containers. Finally, their size is perfect for small batch brewing.

3. Co2 Bottle
The Co2 bottle is a vital part of your homebrewing setup. These bottles store carbon dioxide (Co2) gas under high pressure and are used to carbonate the beer. Once the beer is transferred into your keg, CO2 is injected into it at a controlled pressure. This process dissolves CO2 into the beer, giving you those perfect bubbles we all love in our beer (unless you are a Guinness drinker)
Once opening a tap, the pressurised CO2 pushes the beer out of the keg into your glass without exposing the beer to oxygen, which can degrade it over time. This system allows you to get that professional pour, like what you would get at the pub.

4. Regulator
Your CO2 bottle will be useless without a regulator to control the pressure. Look for a dual gauge regulator where one gauge measures the pressure in the keg, and the other measures the amount of CO2 left in the bottle. It is very important to be able to control the pressure in your keg as different styles of beer often require different carbonation levels.
The regulator also controls the pressure that pushes the beer from the keg through the line and out of the tap. Having the right pressure ensures you get a smooth, even pour with the right amount of froth on top.

5. Keg Couplers and Tubing
These are what is going to connect your CO2 cylinder and kegs to your tap system. For corny kegs you will most likely always be using ball lock connectors. Make sure your setup includes these as well as food grade beer and gas lines that will help maintain the purity and taste of your beer. We recommend regular cleaning and maintenance of the lines to keep your beer tasting as fresh as the first day you bought it.

6. Taps
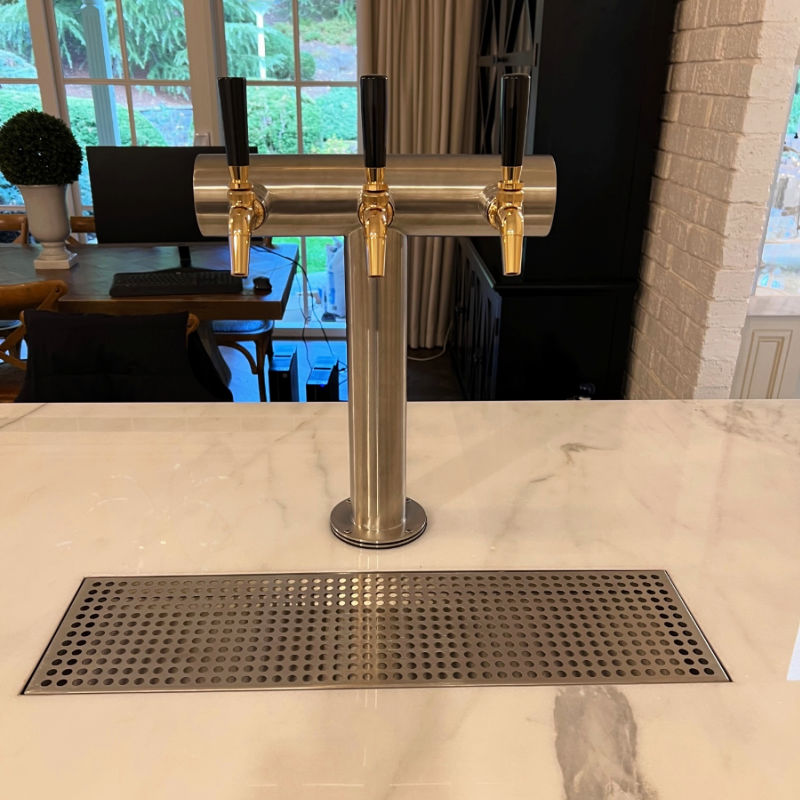
The Tap (also known as a beer faucet) is where your homebrewed beer finally gets to meet the world. It is made up of a few simple parts which include. The Font, this is the main shaft that the tap is mounted on. It is typically always made from stainless steel or chrome plated brass. The lever, which controls the opening and closing of the tap. And the spout, the part where the beer exits the tap.

7. Drip Tray
The Drip tray in a kegerator is a simple yet often forgotten component. It catches any beer, foam, or water that drips or spills from the tap when pouring. This not only helps keep the bench area on the kegerator clean but also prevents sticky beer residue building up on it too. Trust me, it is so much easier to clean a removable drip tray than to scrub beer residue off the kegerator benchtop.
8. Temperature Control
Having precise temperature control over your homebrew beer is crucial for storing and serving beer. Most prebuilt homebrew setups come with built in controls, a separate thermostat or thermometer may be needed for homemade fridge conversions. Maintaining the right temperature can influence beer flavour and carbonation levels. Fluctuating temperatures can accelerate the aging of the beer and lead to spoilage.

Bringing It All Together
Having your own homebrew kegerator setup is a rewarding experience that pays off in the quality and enjoyment of your very own brewed beer. By carefully considering each of these components you will create not just a functional beer dispensing system, but a centrepiece of your new homebrewing hobby. As time goes on and you grow your brewing and kegging experience, you will find new ways to enhance your setup. Whether it’s experimenting with different types of beer or adding more taps, the possibilities are limitless.
We are not just here to guide you through the setup but to also support you throughout your journey. If you ever find yourself stuck or puzzled over your homebrewing setup remember to always reach out to us by phone or email, we are always down for a chat or to help in any way we can.


Leave a comment